ARTHINGTON VIADUCT
Sunday 28th March I decided to visit Arthington Viaduct. The weather was good, the sky looked interesting. By interesting I mean there was a blue sky with white fluffy clouds that were moving quite fast in the sky, I will speak more about this later in this article.
First I will run through a little history of Arthington Viaduct.
The viaduct was built between 1845 & 1849 supervised by chief engineer Thomas Grainger of of Leeds & Thirsk Railways. Randomly Arthington Viaduct goes by 2 other names; Castley Viaduct and Wharfedale Viaduct, Arthington Viaduct is the name people refer to most as it lies in the middle of the village of Arthington.
Fun Facts
*There are 21 semi circular arches that make up Arthington Viaduct and the rise of each arch is 21 foot!
*An excess of 50,000 tons of stone was used in the construction of Arthington Viaduct
How to get to Arthington Viaduct.
If you have a sat nav, the postcode LS21 1NZ will take you right there :). Otherwise once you arrive in Arthington Village you should be on the A659 Arthington Lane, depending on the direction you are coming from you need to look out for a small turning onto a road called Warren Lane. Warren Lane is more of a dirt track and you will need to follow this right to the end. You will feel it is a road to nowhere but it leads to a dead end. From the dead end park up (for free) and walk down the hill by the side of the viaduct. If you cant see the viaduct from where you are, then you must be in the wrong place lol. Your now here 🙂

The Composition
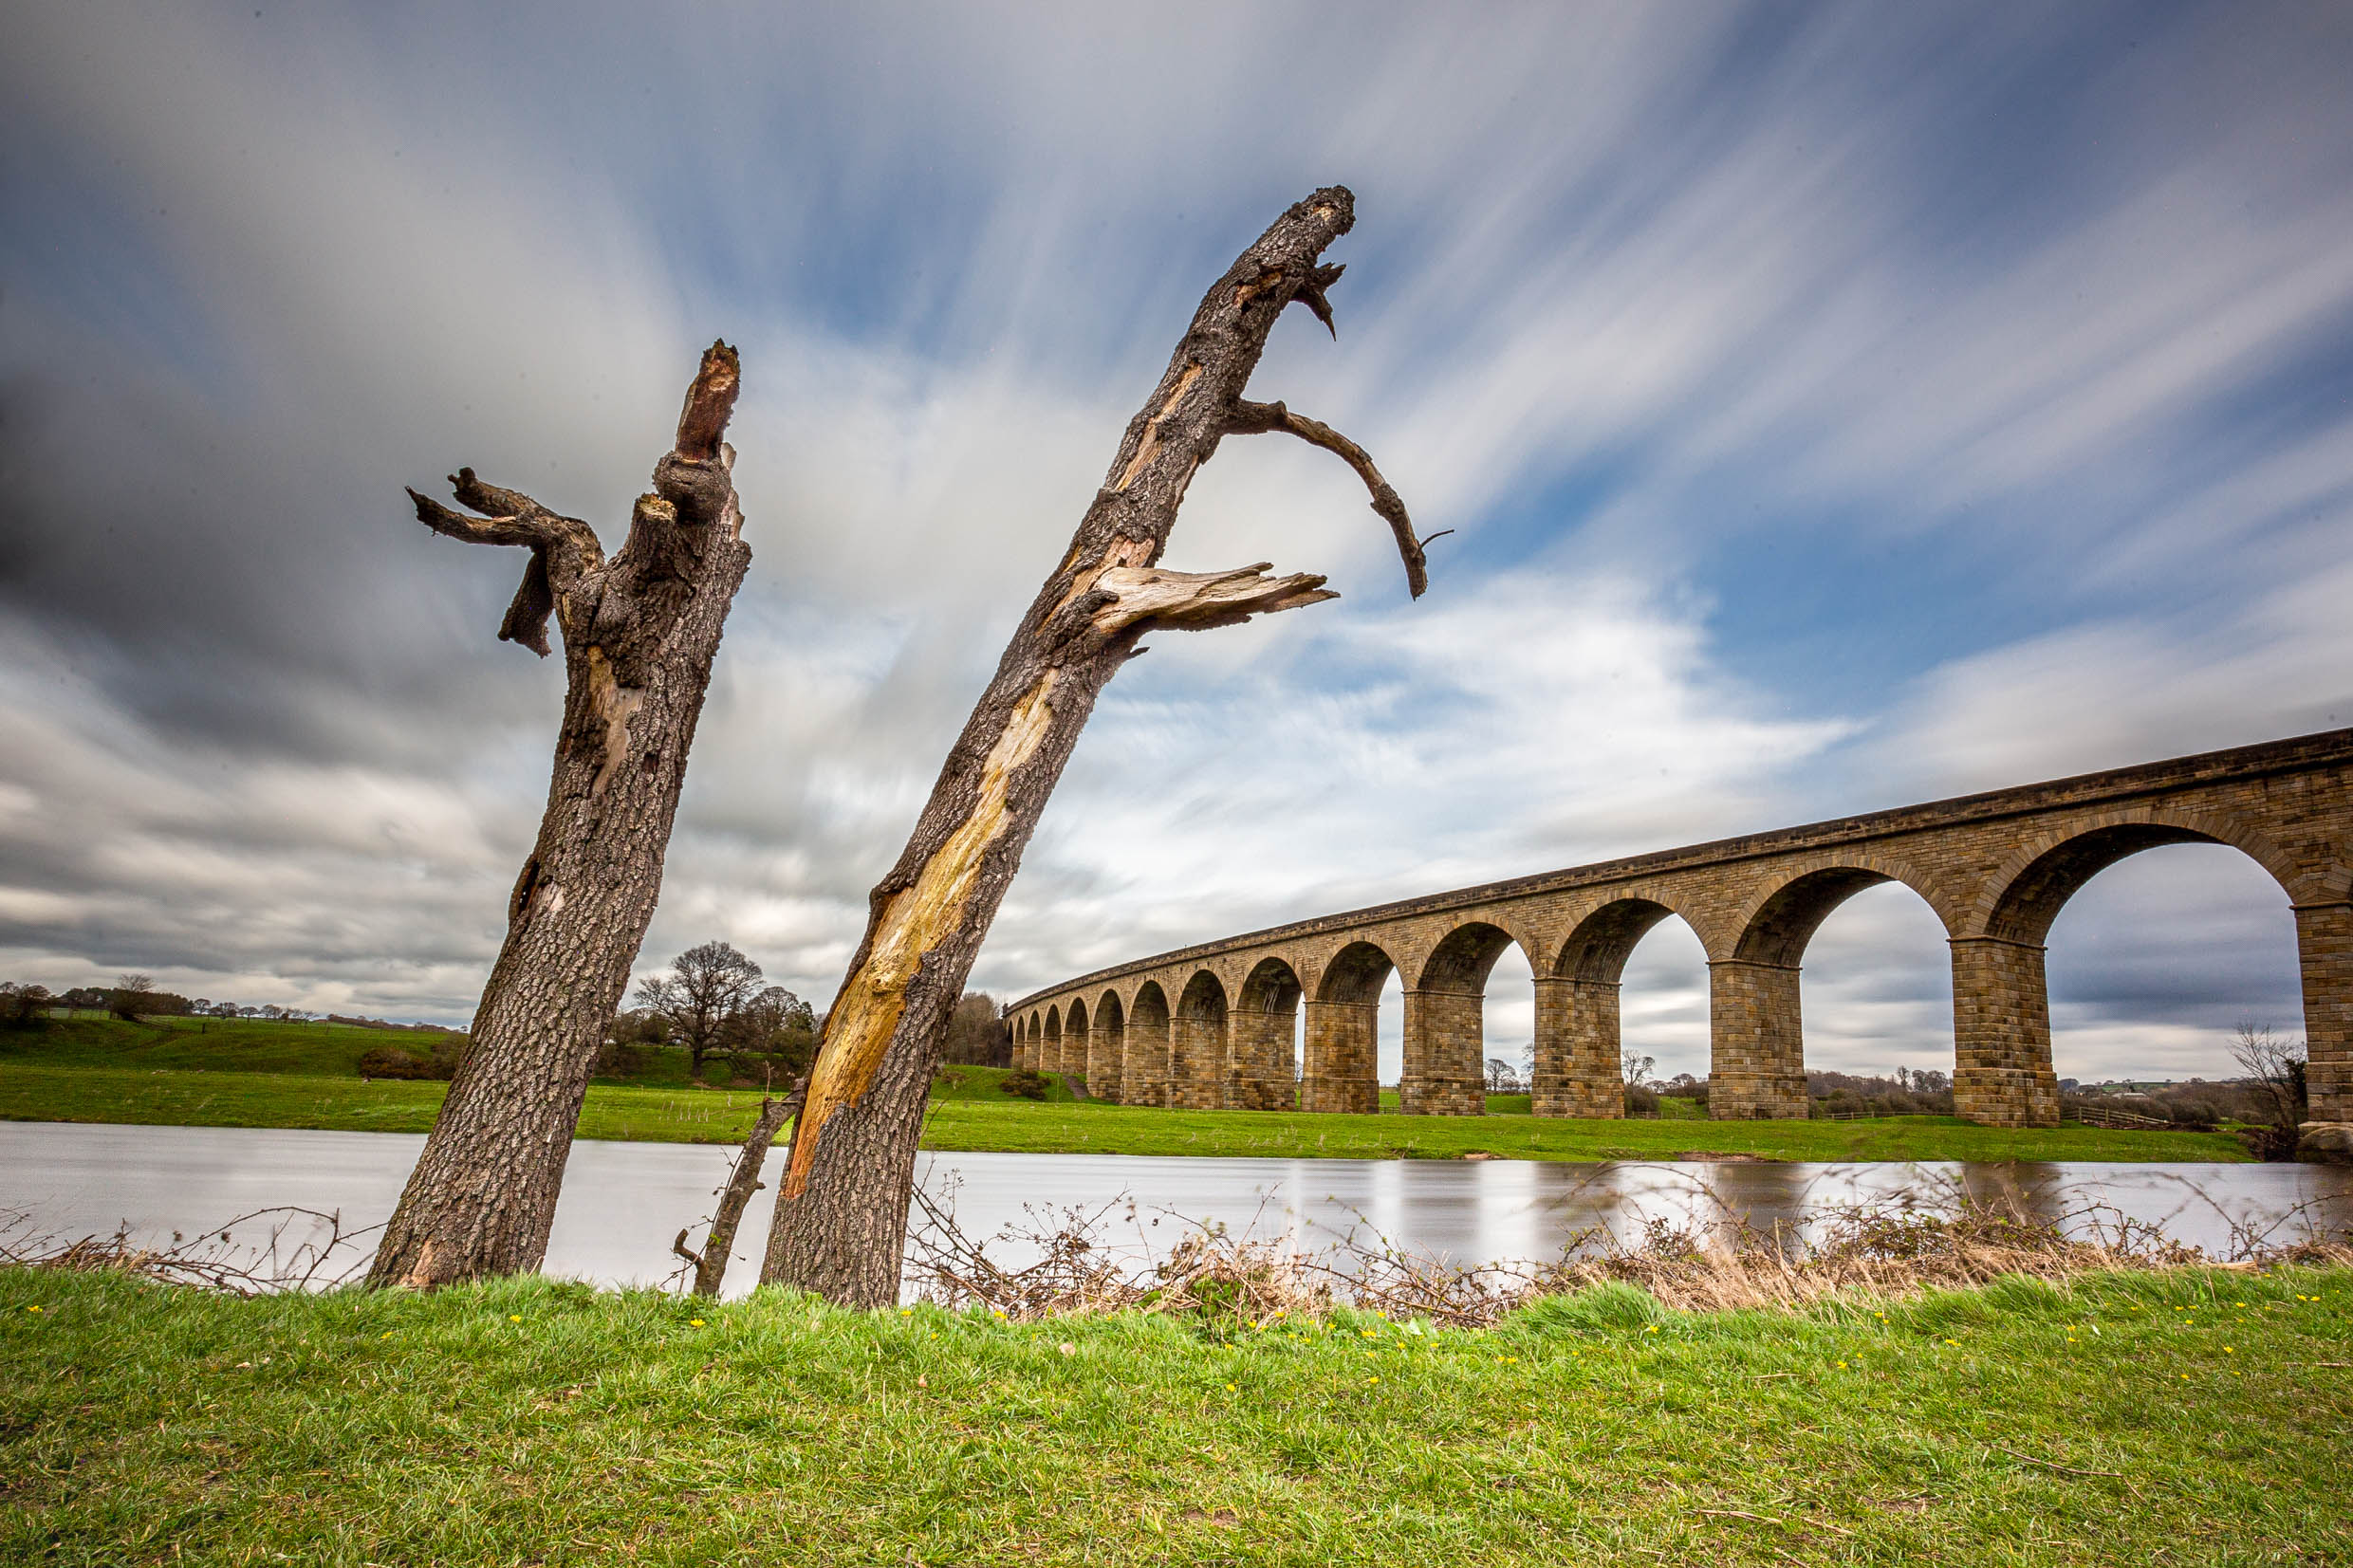
Once at Arthington Viaduct I had a wander down the side of the riverbank looking for an interesting viewpoint. Although the Viaduct in itself is quite spectacular in photography you need something to give the image some oomph & interest. As I mentioned before the skies were blue and the clouds were fluffy, white and moving quite fast in the wind. I had already decided to use these fast moving clouds in the image that I wanted, but I needed some foreground interest to add some depth. As you can see on the image I have shown you, I decided to use the 2 bare tree trunks that were growing out of the side of the footpath on the river bank.
So, I decided to use the tree trunks, the viaduct and the fast moving clouds. To do this isnt really hard to do but you do need some equipment to achieve this, namely a tripod and a filter. I used a 10 stop filter.

The Creation
I decided upon my composition; I just needed to set it up using my photography equipment. As this was planned to be long exposure photography, a sturdy tripod is recommended especially in the wind like it was on this day. I use a Vanguard Alto pro Tripod and love it, it does everything I need it to.
Once my camera was mounted on my tripod, I went about setting up my composition using the trees in the foreground and also using the “rule of thirds” composition technique both vertically and horizontally. I had my shot set up, but there was one last thing I needed to do. It was too bright to achieve movement in the clouds by using the camera, even on ISO 50 I still couldn’t get a long enough shutter speed to show enough cloud movement.
Time for the BIG STOPPER! The Big Stopper is a filter that blocks out 10 stops of light, meaning you can extend your exposure time tenfold. By using the Big Stopper it allowed me to achieve a 30 second exposure, which is plenty of time to show movement in clouds I wanted.
This is the famous Arthington Viaduct!
TOP TIP
When using filters that impede any sort of view through the viewfinder it is always good practice to focus your lens without the filter on. Once the focus has locked in flick the switch on the lens to manual focus. Then screw on or place your filter in it’s holder and your ready to roll.
By switching the ens to manual focus stops the camera from hunting for focus in the dark as the filter is stopping light from coming through. Once the camera starts hunting for focus, your shot could be ruined because it will no longer focused on where you want the focus to be.
Another little tip, if you are not using a remote trigger to take the shot, make sure your camera is on the 2 second timer so you don’t cause any movement when pressing the trigger switch.
Of course I did more than the one shot, I had my dog Chip with me too so it was a great opportunity to do some shots of him running about, bless him. He loves a run 😉 I saw a red kite bird of prey and managed to get a quick snap of that and randomly I found a stone that had the sun painted on it.
You can see the full batch of images below.


Thank You
Thank you for visiting my website and reading about my little trip to Arthington Viaduct. I really hope it was worth reading and again, I really hope my little photography tips help you and your photography journey.
It would be great to see your photographs of Arthington Viaduct too, if you have been here before, please feel free to show me your images or tag me in them on social media.
Oh, Before I forget, please share this post if you like what you have read, it may be interesting to someone else too.
